Repair & Upgrade
* Warning: All information contained herein are for reference purposes only. If you do not feel comfortable working with the vehicle, it is highly-recommended that you use a well-qualified professional mechanic/technician to perform any work on the vehicle. JaguarClimateControl.com is not responsible for any damage or problems caused by use or misuse of this information.
Quick Links:
Heater Valve / DCCV removal
RCCM removal (nav-equipped)
CCM removal (non-nav)
How-to videos — CCM disassembly, assembly, and microphone transfer
Send your CCM or RCCM to us for service
Heater Valve (“Dual Climate Control Valve” or “DCCV”) removal:
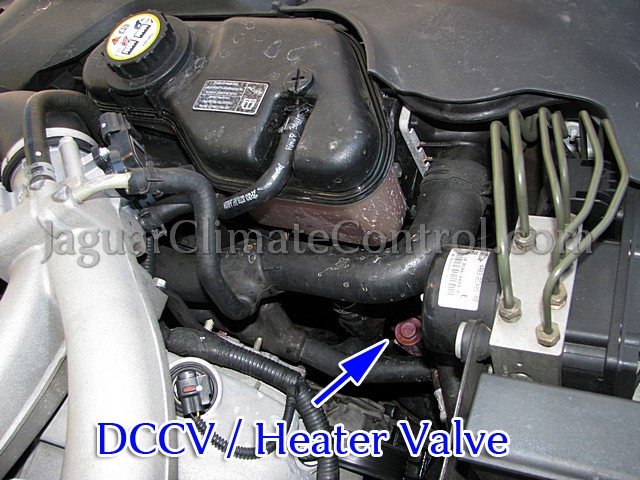
The Heater Valve is located on the passenger-side just behind the radiator. On 03-08 S-Types, look for 3 attached water hoses. 99-02 models have 5 attached hoses.
1. Drain the engine coolant.
2. Unbolt the Coolant/Water Expansion Tank, set it aside so it doesn’t block access to the Heater Valve:
3. Loosen the bolt that secures the Heater Valve to the car:
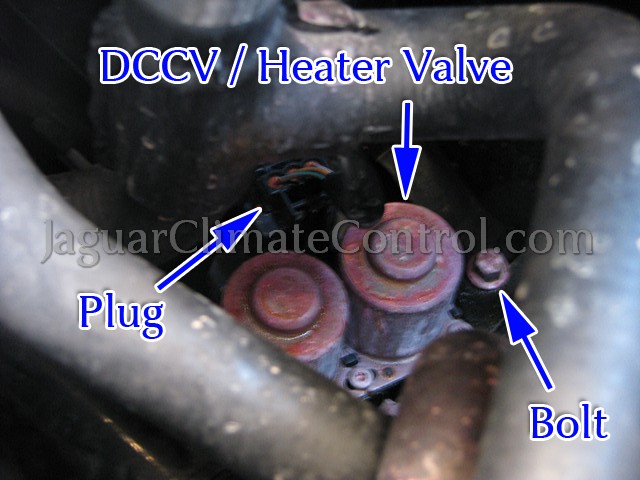
4. Disconnect the attached hoses and remove the Heater Valve. One of our customers (Steve – see his testimonial dated Aug 16, 2010 here: http://jaguarclimatecontrol.com/testimonials/) recommended the use of 45° Hose Clamp Remover Pliers (available on eBay for around $17) to help with hose clamp removal. Thanks for the recommendation Steve!
Remote Climate Control Module (RCCM) removal (for GPS navigation-equipped vehicles):
1. Remove the glove box.
2. Remove the RCCM. It is a black rectangular housing, similar to a VHS tape:
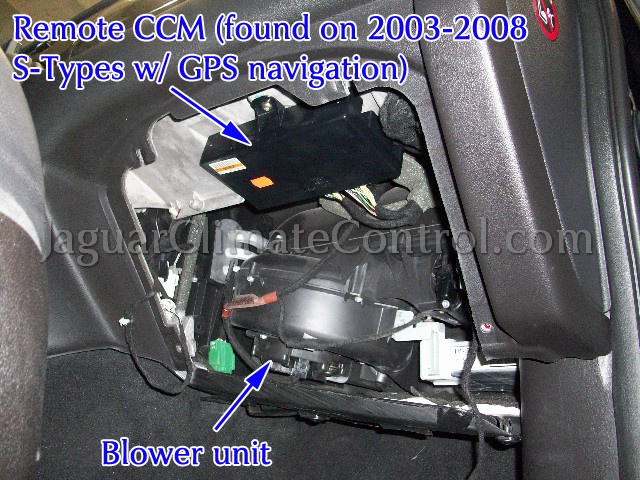
CCM removal (for non-nav. vehicles):
1. Open the center console lid to reveal the center console liner:
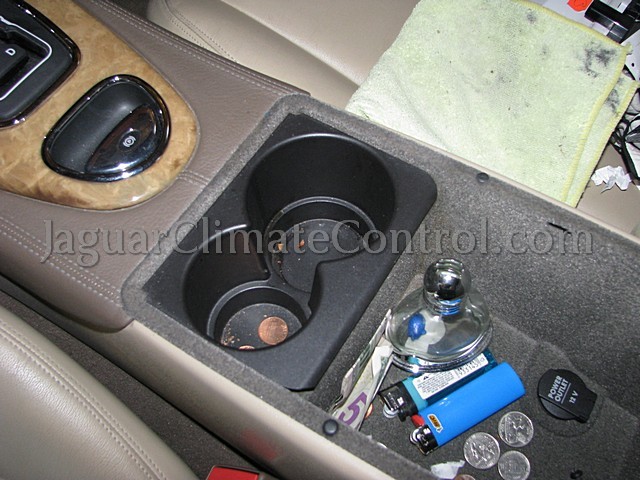
2. Pull out the cup holder from the center console liner and set it aside:

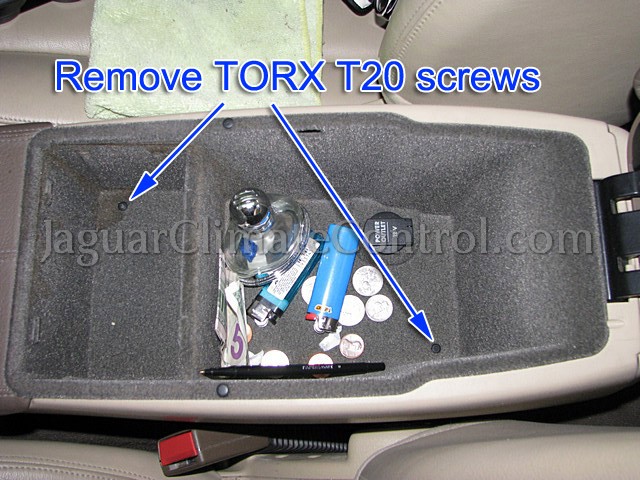
3. Remove the Torx T20 screws from the center console liner. There is one screw directly under the cup holder’s location, and one screw near the rear of the liner:
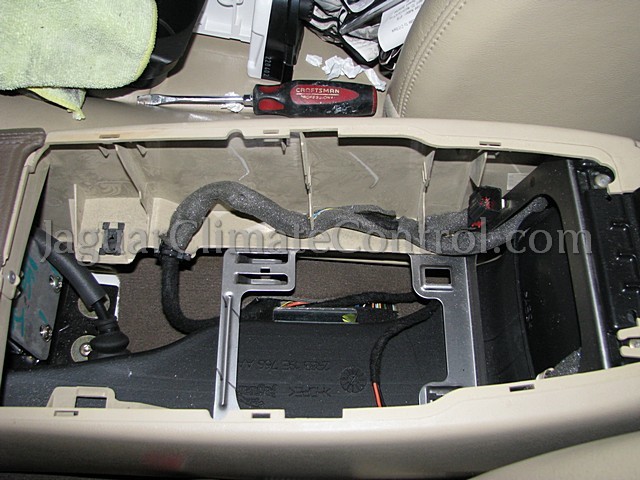
4. Remove the center console liner and set it aside. Unplug the 12V Power Outlet connector from under the liner:
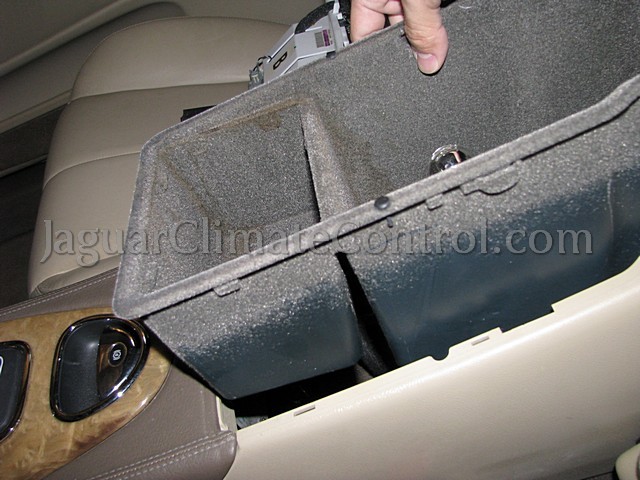
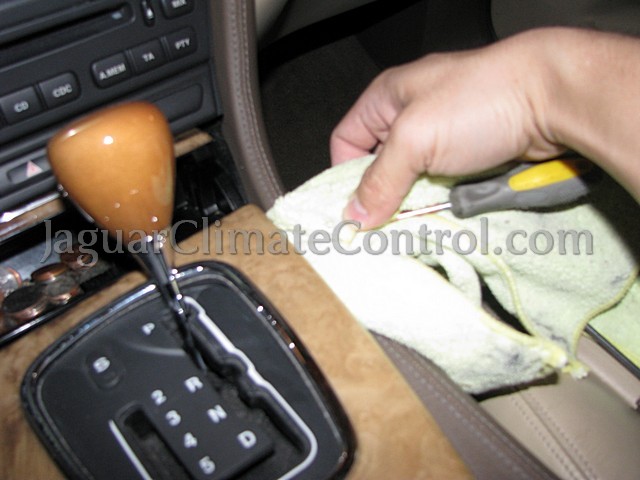
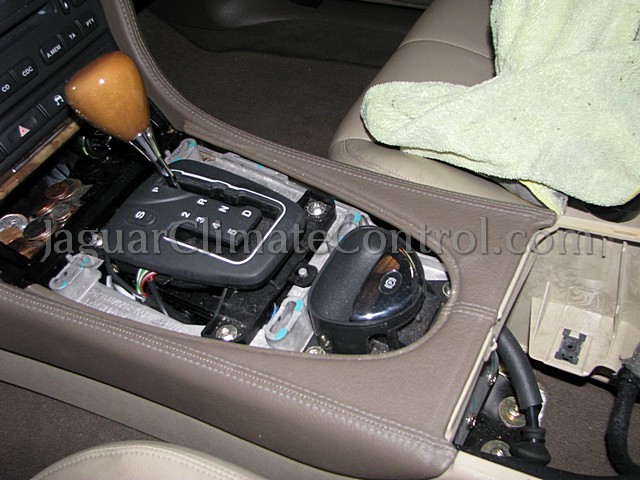
5. Carefully use a flat prying tool (or wide flat head screwdriver) covered with microfiber cloth to gently pry up the shifter bezel/surround. It is clipped in tightly, but is backed by a metal structure, so it is actually quite strong. Work your way around its perimeter until the entire shifter bezel is released. Set the bezel aside:
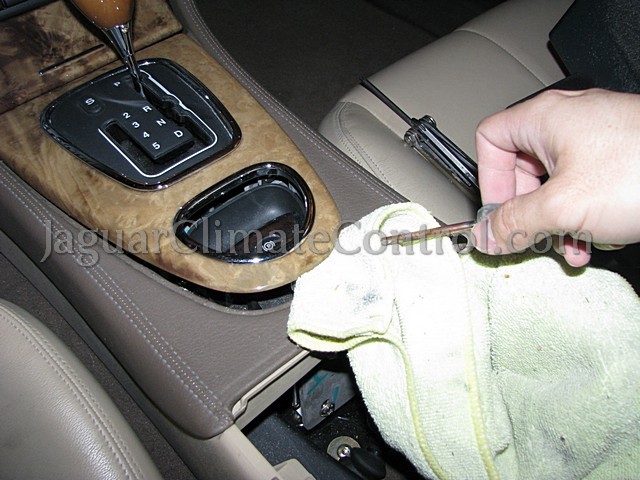
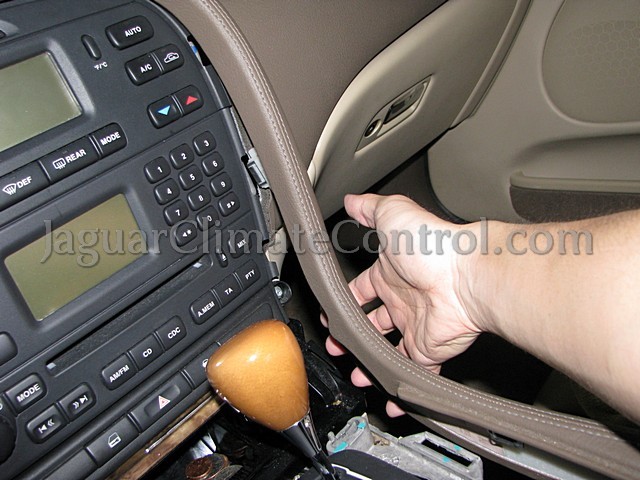
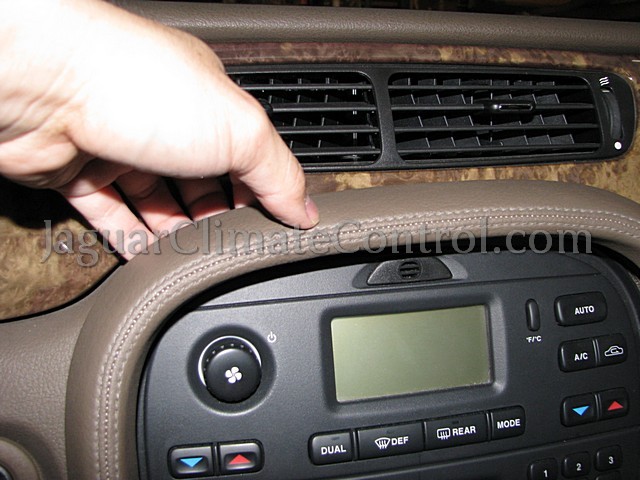
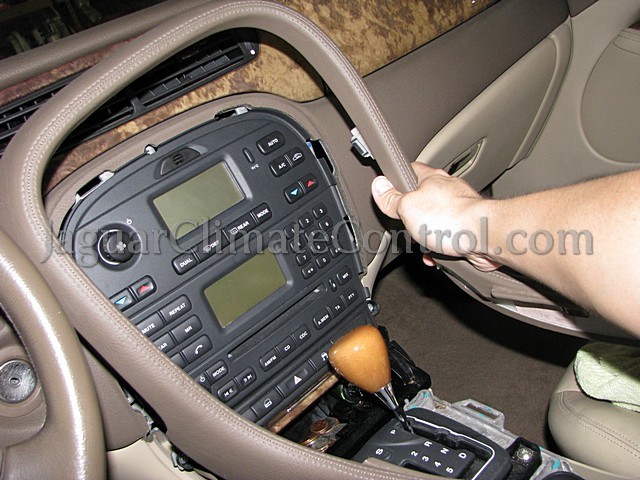
6. Carefully use your hands to pry the main trim up and away. Set the main trim aside:

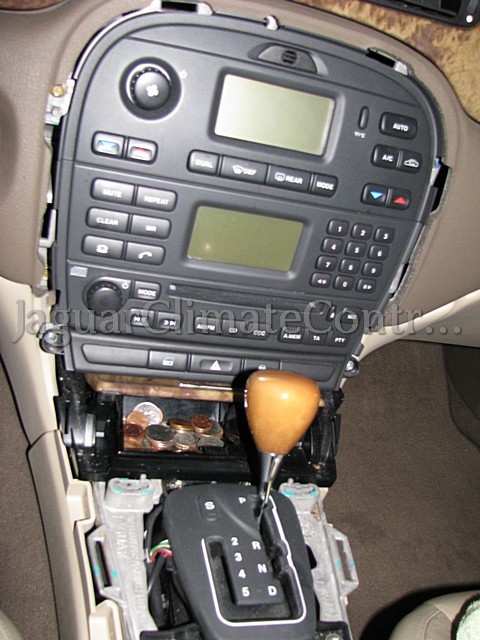
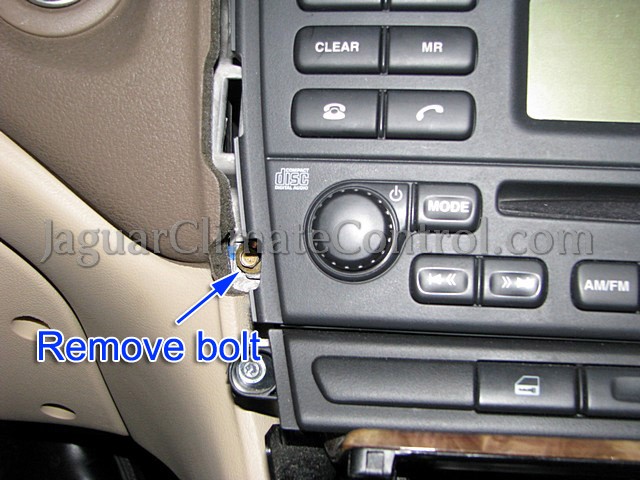
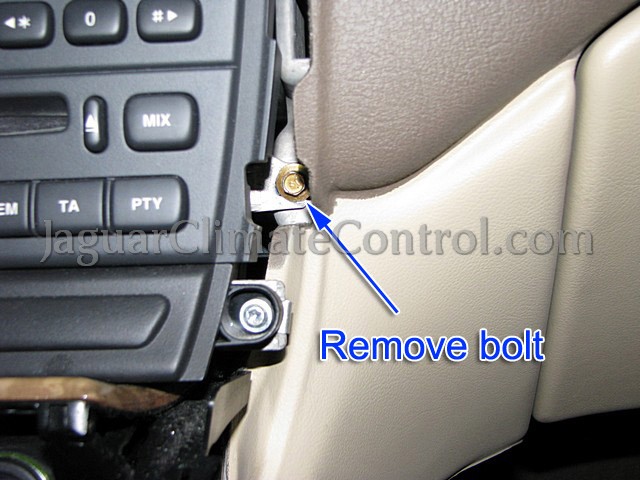
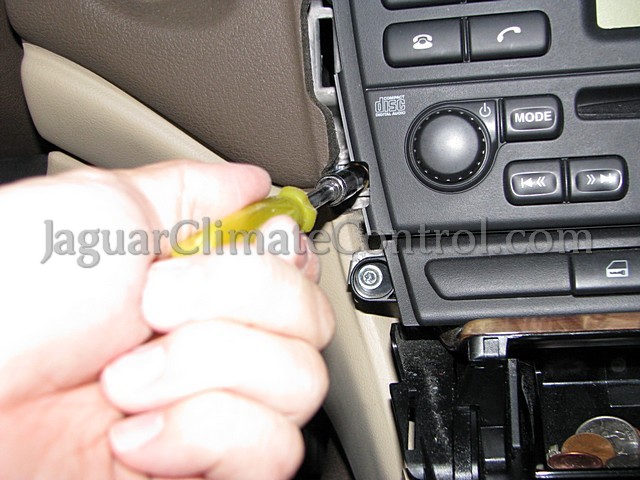
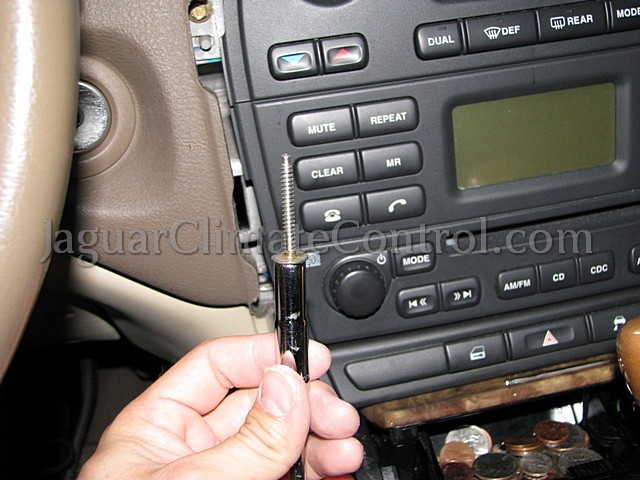
7. Remove the four 7mm bolts that secure the CCM and radio cluster. Protect the ash tray door and shift knob with a microfiber cloth:
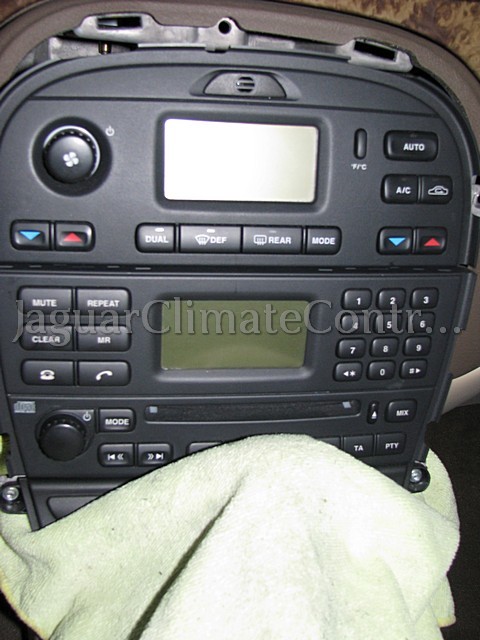
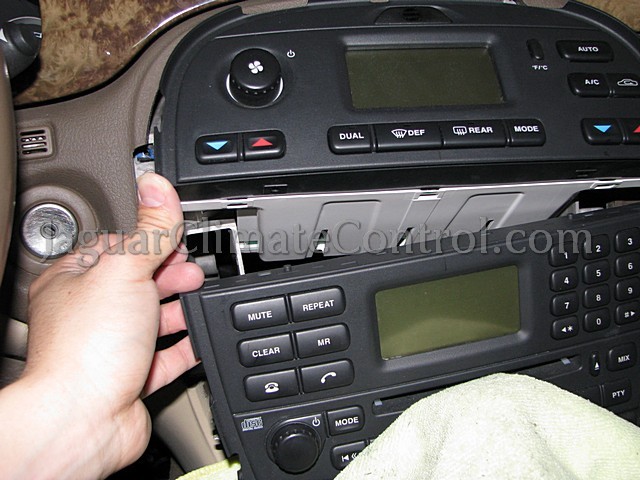
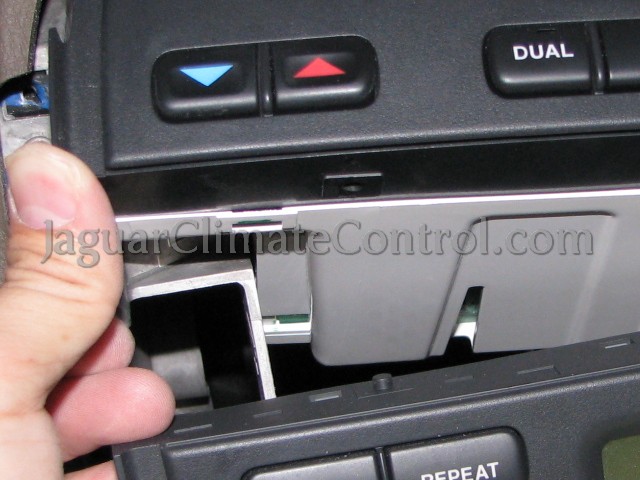
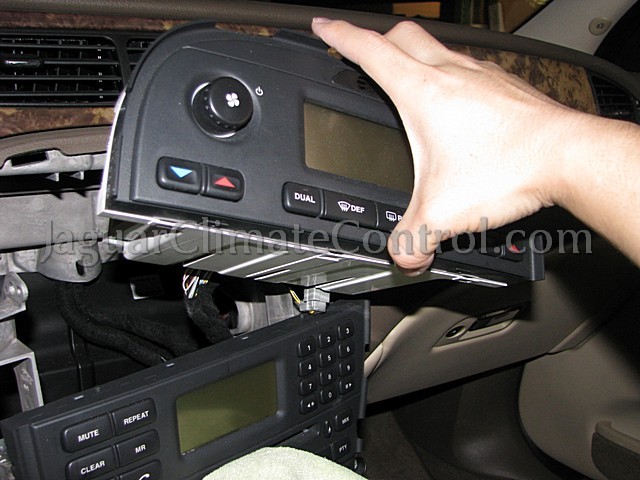
8. The CCM housing and radio are secured to a cast metal frame, all of which will come out as one unit. Once the assembly is removed from the dash, there are two Torx T20 screws on each side of the CCM holding it to the cast metal frame. Remove these screws and lift the CCM forward/up out of the frame. The CCM housing and radio are also keyed to fit direct on top of each other:
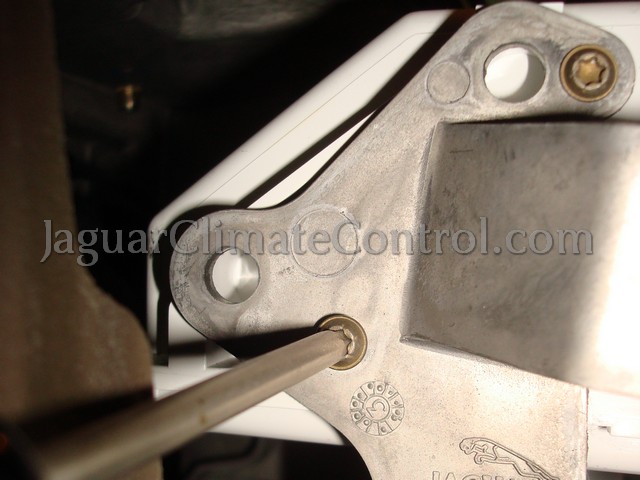
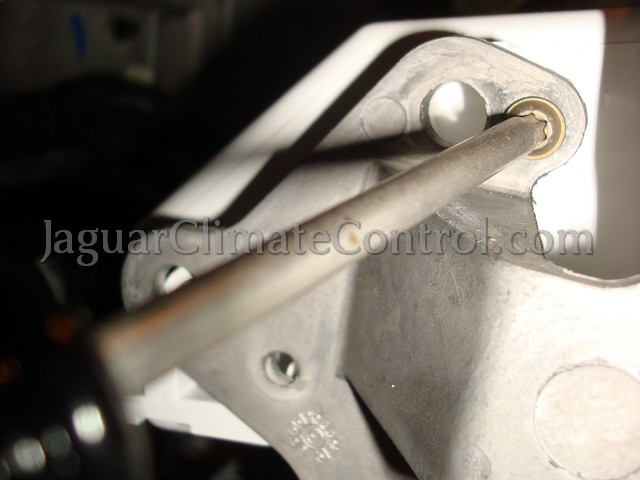
(Thanks to Jim Elgin for submitting these two pictures showing the metal frame and Torx T20 screws!)
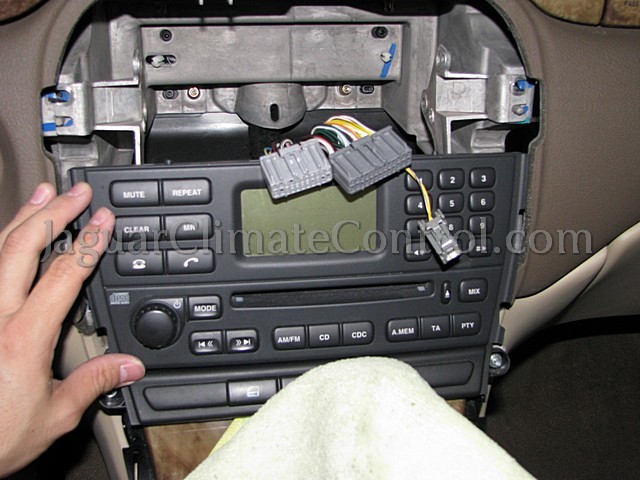
9. Unplug the 3 connectors from the Climate Control Assembly:
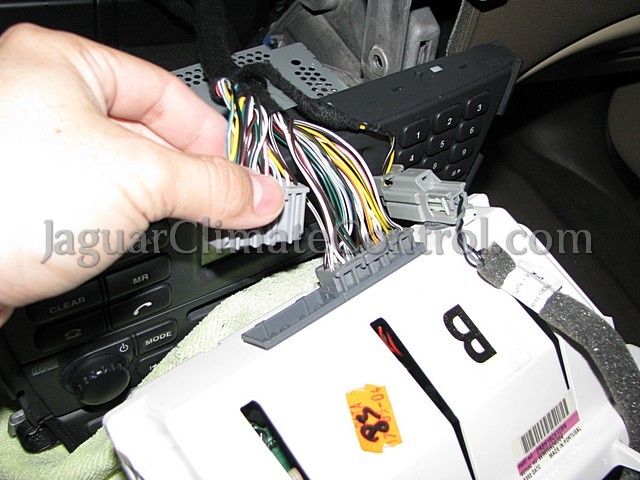
10. Remove the CCM housing. If you plan to continue driving your car, you may re-install everything in reverse order without the CCM. The car will drive just fine, but you may get a tad warm!
How-to videos — CCM disassembly, assembly, and microphone transfer:
How to disassemble the module:
http://www.youtube.com/watch?v=QjObTD8ssRk rel=0
How to assemble the module:
http://www.youtube.com/watch?v=Kxot92xHe-w rel=0
How to remove the mic to transfer to another unit:
http://www.youtube.com/watch?v=OzsIVBoEWlY rel=0
How to attach a mic from another unit:
http://www.youtube.com/watch?v=fplvKEYxneM rel=0
Send your CCM or RCCM to us for service:
To send in your Climate Control Module for Repair & Upgrade (w/ fault protection circuitry), use the contact form at http://jaguarclimatecontrol.com/contact-us/.


